MACHINE PARK
STATE-OF-THE-ART TECHNOLOGY OVER 1600M²

LATEST TECHNOLOGY
OF THE HIGHEST QUALITY
CNC machining centres
- 5-axis high-performance machining centre
Hedelius ACURA 65 EL with integrated rotary swivel table unit and 65-multiple tool magazine.
Main spindle upgrade to 18,000 min-1
Spindle power: 35.0 kW/142 Nm
Traverse paths:
X-axis 700 mm
Y-axis 650/465 mm
Z-axis 600 mm
Incl. handling system pallet storage Indumatik
Automatic system for loading and unloading workpiece carriers for 12 pallets of size 400 x 400 mm
Laser tool control system for non-contact tool measurement and tool damage detection
Collision monitoring
Year of manufacture 2017 - 5-axis machining centre
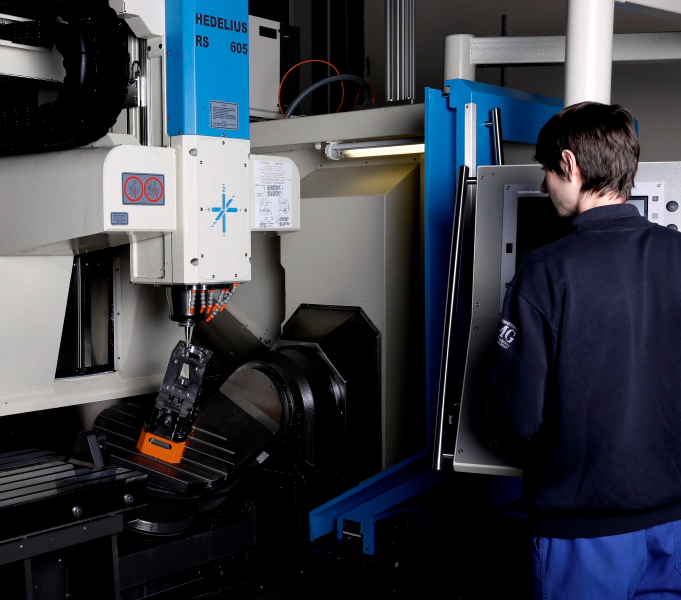
Hedelius RotaSwing 605 K20 with integrated rotary
swivel table unit and 30-multiple tool magazine.
Main spindle upgrade to 12,000 min-1
Spindle power 22.00 kW/111 Nm
Traverse paths:
X-axis 1330/620 mm, long operation 2000 mm, swing operation: 950/620 mm.
Y-axis 650/385 mm
Z-axis 520 mm
Incl. work area separating wall for swing operation
Tool damage detection
3D infrared touch probe
Toolsetter 2D touch probe for measuring and checking the tools
Year of manufacture 2012
CNC lathe
- 2-axis universal lathe
DMG MORI CLX 450 V6 with driven tools, C-axis, Y-axis and counter spindle.
Main spindle 4,000 min-1
Spindle power 17/25.5 kW
12-multiple servo tool revolver with 12 driven tool stations
Direct path measuring system X-,Y-axis
Incl. automatic loading magazine
for short bars, bar capacity D80 mm
Workpiece pick-up device for parts up to D80x200 mm, weight max 4 kg
Parts compartment outside the working area
Turning diameter max. 400 mm
Turning length 800 mm
Year of manufacture 2020 - CNC lathe
Gildemeister CTX 400 S2 with driven tools
main spindle 5.000 min-1
spindle power 21 kW
12-multiple tool revolver
Turning diameter max. 470 mm
turning length 600 mm
Year of manufacture 2001
Measuring equipment
- Measuring arm Faro Prime
6-axis, 2.4m 8 Ft.
Repeatability +/- 0.024 mm (single point accuracy)
Accuracy +/- 0.034 mm (volumetric maximum deviation)
Typical applications
Automotive: tooling, alignment, part inspection.
Metal fabrication: Initial inspection, part verification
Aerospace: alignment, tool and mould certification, part verification.
Includes Faro 3D measurement platform software, for efficient fulfilment of quality assurance and inspection tasks. Perfect for managing repetitive inspection routines.
Year of manufacture 2013
Robot station for testing gripper and handling systems
- Robot model YASKAWA MH50 II
The versatile MH50 II is a flexible, 6-axis, high-speed robot with a max. payload of 50kg and a max. working range of 2061mm. It is particularly suitable for handling, machine tending, processing and distribution applications.
Important technical data:
– Design: articulated arm robot
– 6 electrically driven servo axes with absolutely precise pulse encoders
– max. payload (per arm): 50.0 kg
– max. reach (per arm): 2061 mm
– repeatability: better than +/- 0.07 mm
Year of manufacture 2019
Material preparation
- 2-column high-performance bandsawing machine
BERG & SCHMID SBS 420 VA-I CNC
Cutting diameter round: 420 mm
Cutting diameter square: 420 mm
Cutting diameter flat: 420 x 420 mm
Year of manufacture 2019 - Double mitre band saw
BERG & SCHMID GBS 250 Super AutoCut
Cutting diameter round: 255 mm
Cutting diameter square: 240 mm
Cutting diameter flat: 300 x 180 mm
Year of manufacture 2018 - Underfloor aluminium circular saw
BERG & SCHMID MultiCut 401 HA
Cutting diameter round: 110 mm
Cutting diameter square: 100 mm
Cutting diameter flat: 200 x 60 mm
Year of manufacture 2019
Conventional machines
- Various drilling, turning and milling machines
Welding process
- Welding of machine frames, small series production of assemblies
TIG, MIG, MAG welding - Welding table EcoLine
Demmeler Maschinenbau GmbH
table size: 2400x1200mm
Year of manufacture 2010
GET IN CONTACT WITH US!
